
WordPress Wednesday Tip 29: How to Create a Signature for Your Blog
Reading Time: 4 minutes
You know that blogging is a great way to improve SEO, drive visitors to your site, and gain credibility in your industry, but did you know your blog is also great for building relationships with current and prospective customers?
One easy way to gain trust outside of your content is to include your headshot and a custom bio, or signature, to each of your posts. Theresa’s blog signature is in the image below.

A blog signature lets your audience members get to know you a little better and put a face to your name. And in this week’s WordPress Wednesday post, we’re going to show you exactly how to create a signature for your blog step-by-step.
Ready? Let’s get started.
WordPress Wednesday Tip 29: How to Create a Signature for Your Blog
1. Create a new blog post. (Want to learn how to add a new blog post? Check out WordPress Wednesday Tip #11.)
2. If you’re not already in the Divi Builder, click on the purple ‘Use the Divi Builder’ button. The Divi Builder will allow you to create different sections, use different column layouts, and add different types of content modules to your post.

3. The content of your post is in the ‘Text Module’.

4. To begin creating your signature, click on ‘Add Row’.

5. Select the ‘1 column’ structure.

6. Click ‘Insert Module(s)’ on the column.
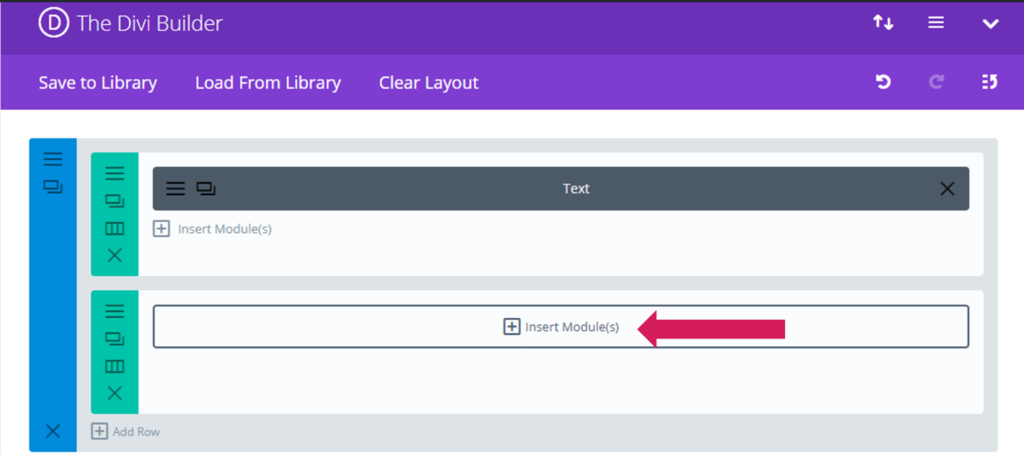
7. Select the ‘Text’ module.

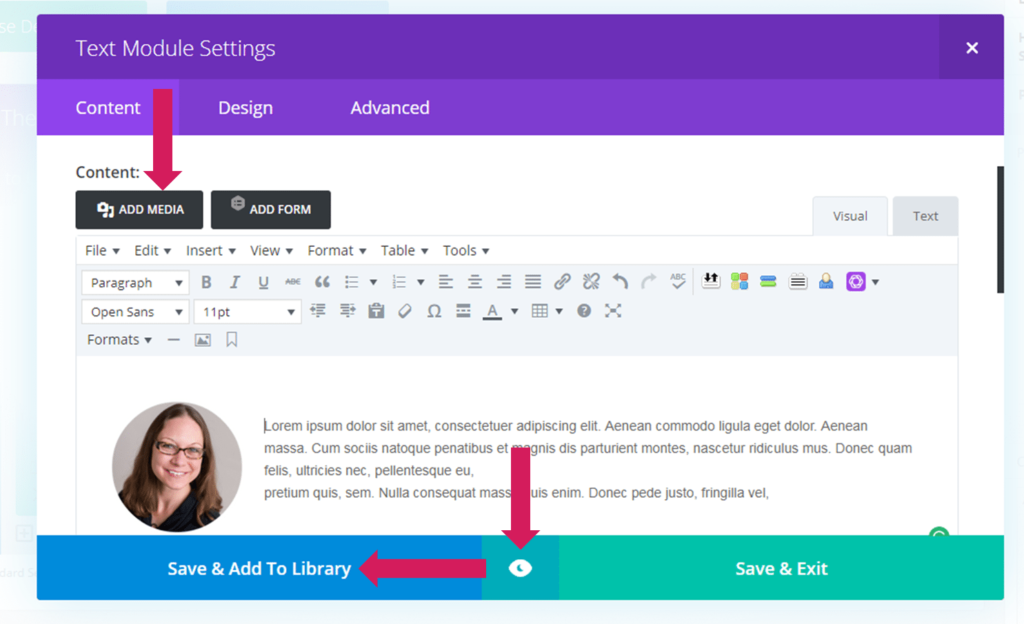
8. Click on ‘Add Media’ button and upload your headshot. (Hint: If you need to resize, change the shape, or edit your image, you can do so in a free online graphics editor, like PicMonkey.)
- Add the content of your bio.
- Click and drag your headshot to position it with your bio.
- Preview the page by clicking on the ‘Eye’ icon.
- When you’re satisfied with your bio, click ‘Save & Add to Library’ to make it available to use on all posts.
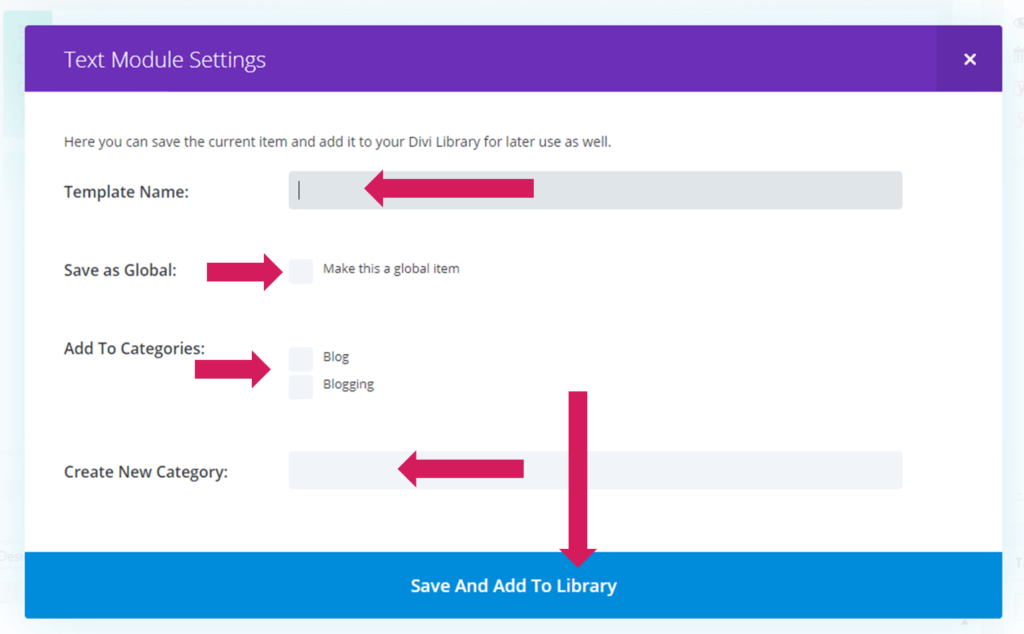
9. In the Library popup:
- Give your signature a name. Make it something that will make it easy to identify later, like ‘My blog signature’.
- If you want to be able to make bulk edits to your signature, check the ‘Save as Global’ box. This means that if you ever change the template, it will automatically update every single place where it’s been used.
- If you’ve created any template categories in the past and want to assign it to one, check the appropriate one. To create a new category to assign it to, fill in ‘Create New Category’ field.
- When finished, click ‘Save and Add to Library’.
How to Add Your Signature to Future or Previously Published WordPress Posts
1. Switch over to the Divi Builder and click ‘Insert Module(s).
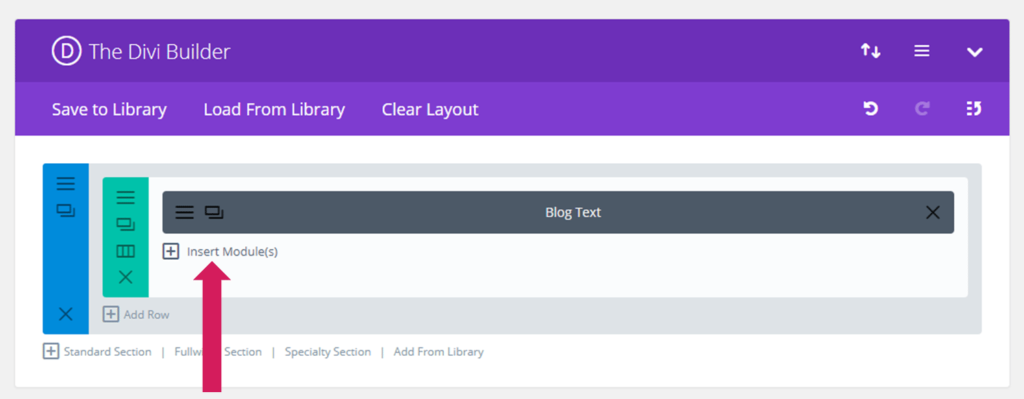
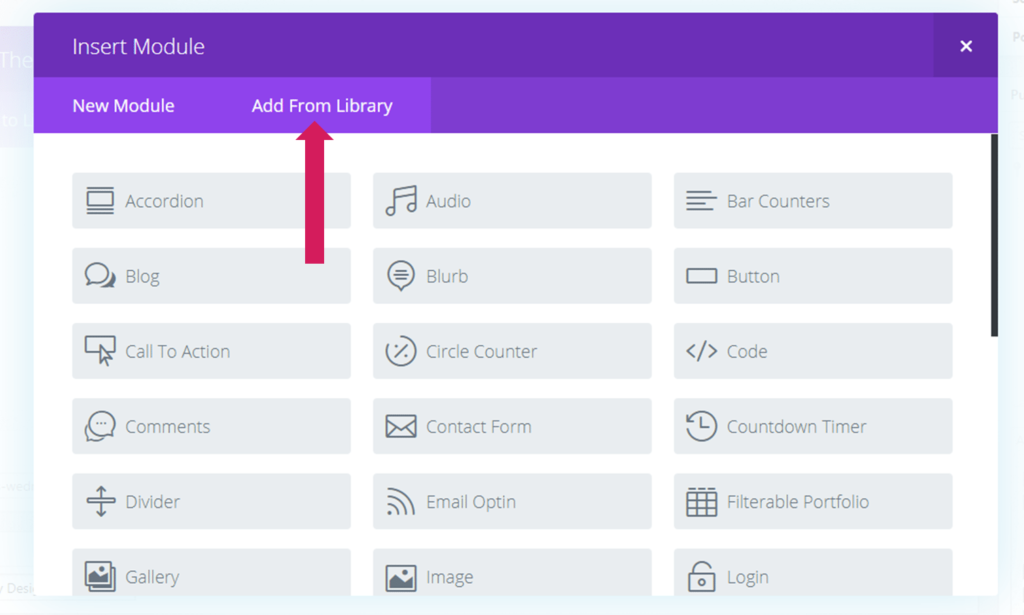
2. In the ‘Insert Module’ popup, click ‘Add From Library’.
3. Click on the saved module.

4. It will now be inserted into your blog post.

In Sum
In a crowded and competitive online world, establishing trust is crucial if you want to gain a loyal following and customer base. Leads and potential customers want to see the face behind the services and products they use. Take the time to create a signature for your blog that includes a customized bio and headshot and you’ll be on your way to nurturing relationships that last a lifetime.
Did you enjoy WordPress Wednesday Tip 29: How to Create a Signature for Your Blog?
Let the world know and share it on social media!
Share This Post
If you read this Do It Yourself WordPress post and still need help, we got you! Either drop a message to us in the chat or Schedule a Call!
