
WordPress Wednesday Tip 28: How to Create a Form with Gravity Forms
Reading Time: 6 minutes
Almost every single website you visit includes at least one form somewhere on the site. Chances are, yours does too. Whether they provide visitors a simple way to contact you, sign up for your newsletter, or submit an order, forms are an essential part of your site and overall marketing funnel. And the great news for WordPress users is that you can easily create a form with Gravity Forms! Even better? This week, we’re going to show you how to use this easy plugin!
Ready? Let’s get started!
WordPress Wednesday Tip 28: Create a Form with Gravity Forms
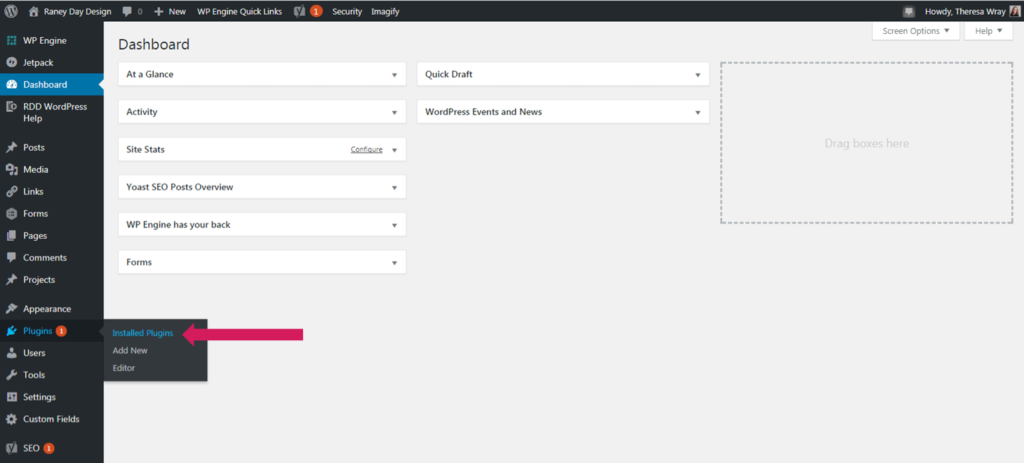
First, make sure Gravity Forms is installed on your site. To check, hover over ‘Plugins’ and click on ‘Installed Plugins’. Look through your list for ‘Gravity Forms’. If it’s not installed, you can purchase and download it here.

Create a Form with Gravity Forms
1. Hover over ‘Forms’ and click ‘New Form’.

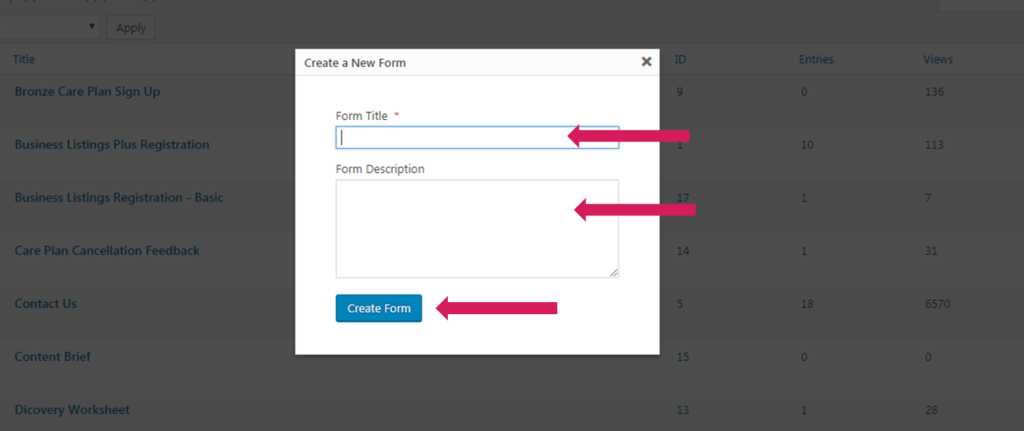
2. Give your form a title, add a description, and click ‘Create Form’. You will be redirected to your new form’s creation page.
3. Gravity Forms uses both a ‘Click’ editor and a ‘Drag & Drop’ editor. You can add fields to your form by simply clicking on them or by hovering over a specific field on the right hand side of the screen, clicking & holding your left mouse button, and dragging the field to the gray area towards the left hand side of the screen. Release the mouse button to drop it into place.
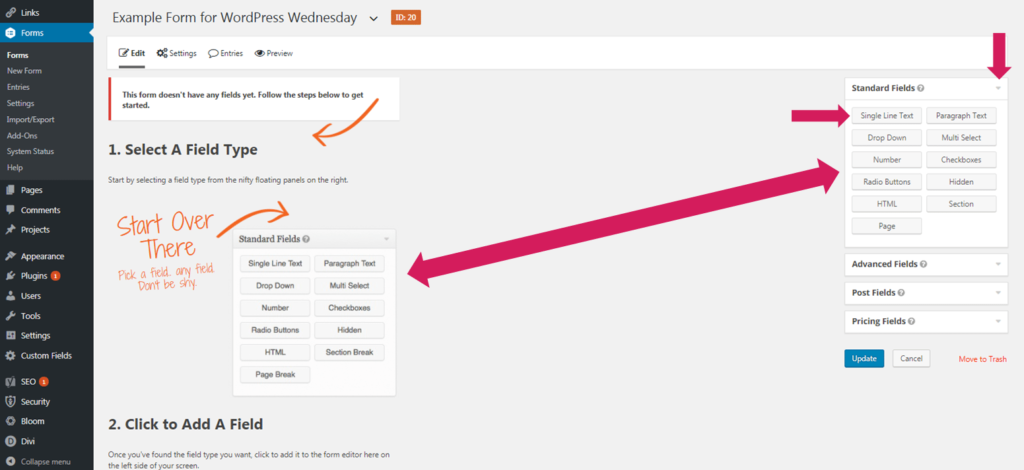
4. Begin by deciding what Field Type you want to add. Think through what you want the person filling out the form to do. For example, do you want them to select an option? Answer a question with limited choices? Provide detailed information? This will determine what Field Type you select. Click on the down arrow on the different Field Types to view their options.
- Standard Fields are basic field types.
- Advanced Fields are more specific field types and include common fields on many forms.
- Post Fields include blog post-related fields that turn the submitted information into a Draft Post.
- Pricing Fields include fields that calculate pricing for your products or services.
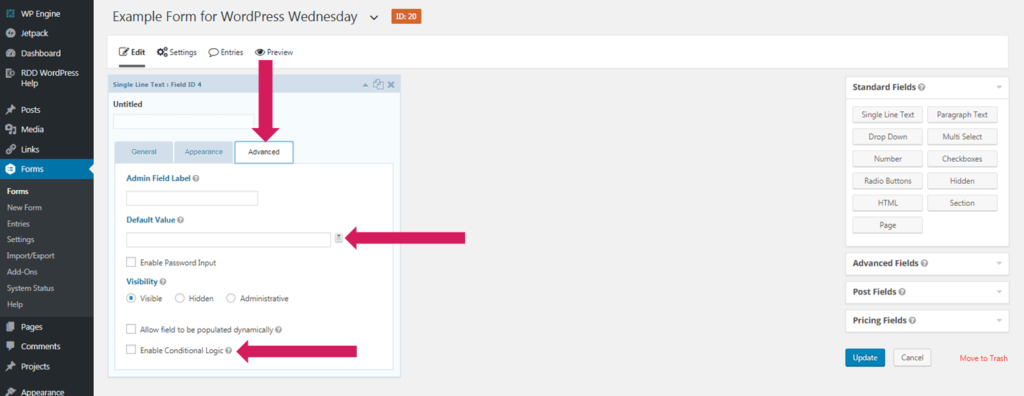
5. Edit the field by clicking on the down arrow.
- The ‘General’ tab is where you enter standard information, such as the Title of the field label that viewers will see, any information or instructions you want them to read, and whether the field is required. Options change depending on the type of field you’ve created. For example, a ‘Number’ field will include options related to number formats and minimum/maximum values.

- The ‘Appearance’ tab allows you to customize the field. For example, you can move the location of the field’s description, change the size of the field, or add Custom CSS Class to override the form’s default settings. (For a list of Gravity Form’s Custom CSS Classes, click here).
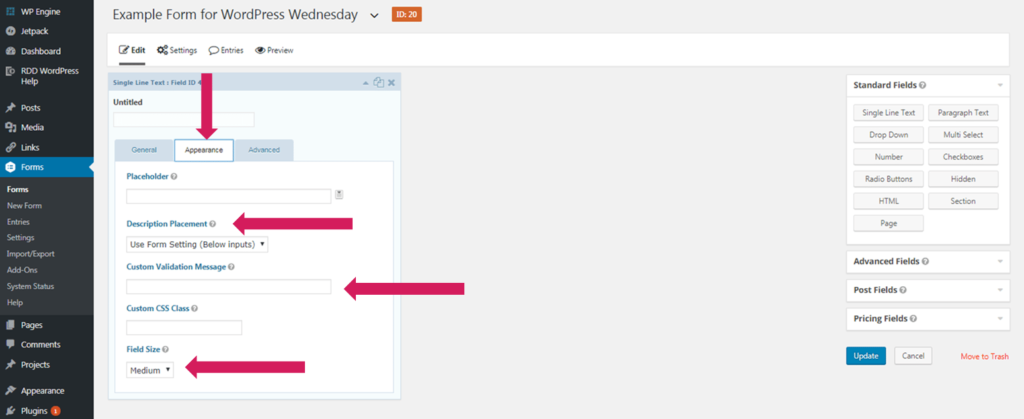
- The ‘Advanced’ tab allows more advanced customization, such as setting default values and enabling conditional logic.
6. You can reorder your fields by dragging and dropping them. To do this, hover over the top blue bar until you get the crossed arrows, click & hold your left mouse button, and drag the field to its new location. Release the mouse button to drop it into place.

7. When you’re all finished with your form, click the blue ‘Update’ box on the right hand of the screen.

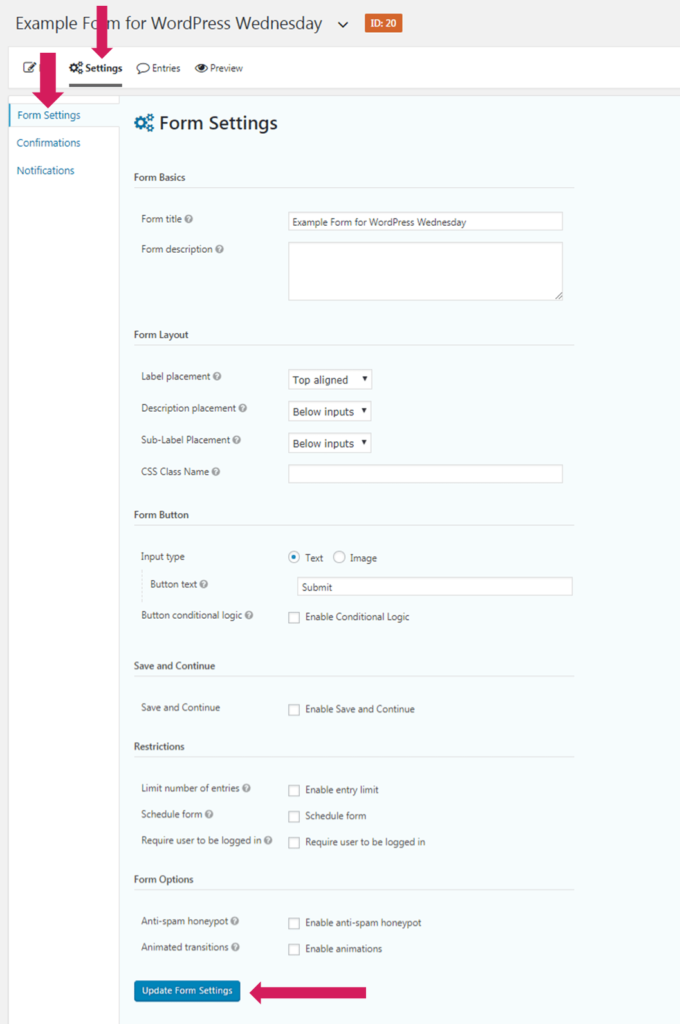
8. You can further customize your form by clicking the ‘Settings’ tab and then ‘Form Settings’. Don’t forget to click ‘Update Form Settings’ when finished.
Setting Up Gravity Form Confirmations
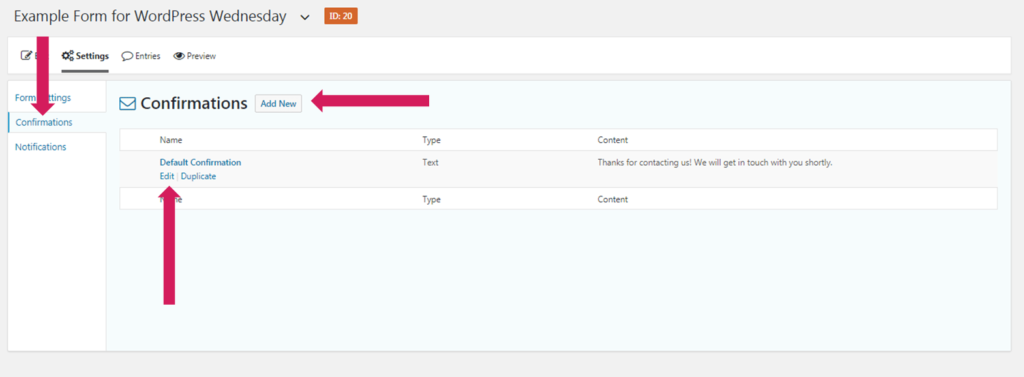
9. Any form you create using Gravity Forms has a default Confirmation Message that a person will see once they submit their form. You can change this by clicking ‘Confirmations’.
10. From here, you can add an entirely new confirmation or edit the existing default one. Whichever you choose, don’t forget to click the blue ‘Save Confirmation’ button at the bottom of the screen.
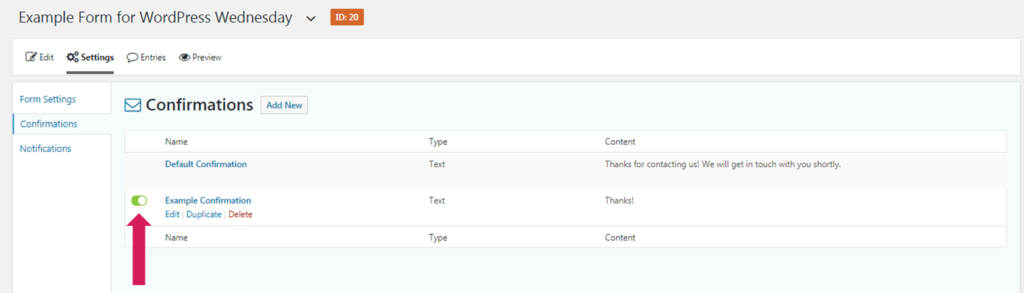
11. Turn the confirmation on and off by clicking on the green activate button.
Setting Up Gravity Form Notifications
12. When you create a form with Gravity Forms, it also adds a default ‘Notification’ that the administrator of your website will receive. You can change this by clicking ‘Notifications’.
13. From here, you can add an entirely new notification or edit the existing default one. Whichever you choose, don’t forget to click the blue ‘Save Notification’ button at the bottom of the screen.

14. Turn the notification on and off by clicking on the green activate button.
****For more details on setting up Gravity Form Notifications, check out: WordPress Wednesday Tip 16: Setting Up {or Changing} Form Notifications.
Putting a Form on a WordPress Page or Post
15. Navigate to the page or post you want to put your new form onto.
16. Put your cursor where you want your form displayed and click the ‘Add Form’ button.

17. Select the form you want to display from the drop down box and click ‘Insert Form’.

18. The form id will now show in the visual editor. To see what your form looks like on the actual page, click ‘Preview’.

19. If you need to edit your form, save a draft of the page or post you’re working on and then go back to the form by hovering over ‘Forms’ and clicking ‘Forms’.

20. When finished, go back to the page you were working on and preview the changes. When you’re satisfied with the way the form looks, click ‘Publish’.
Still with us? Great! You now know how to create a form in WordPress using Gravity Forms! Your visitors can now contact you. You can also capture their information to help move them through your marketing funnel! Congratulations! What kind of forms will you create first? We’d love it if you shared it with us in the comments below!
Would your social following appreciate this tip as much as you?
Share it with them now!
Share This Post
If you read this Do It Yourself WordPress post and still need help, we got you! Either drop a message to us in the chat or Schedule a Call!
